I'm in the midst of needing to re-do my sewing/crafting/office space - it needs it - desperately!! If you came into my house right now I would be so embarrased. I have a gazillion yards of fabric everywhere and have taken over the entire dining room and office. I am the type of person that needs my space to be organized and put together in order to feel like I can move ahead and create.......well right now, I should be at a stand-still because it is a disaster!
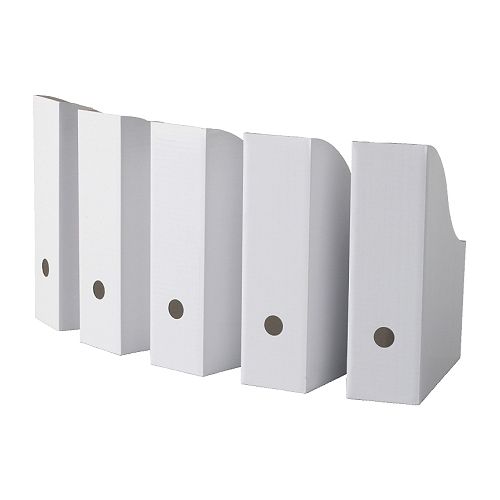
So in an effort to start to re-do my "studio" (that's what we'll call it.......sounds good, right?), I decided to start with an easy project. Several years back I had purchased some inexpensive cardboard magazine files from IKEA - these to be exact:
They are only $2.99 for a pack of 5 - a bargain!! But look at them.......they are screaming for some color. So here is my overhaul project for these great deal, but not so pretty, magazine files.
Pretty Covered Magazine File Tutorial
Supplies:
-Magazine files
-Pretty scrapbook paper
-Glue
-Scissors or a paper cutter
-Pencil or pen
Directions:
Grab your scrapbook paper. I used Amy Butler's scrapbook pack so that I would have a bunch of designs and colors that all coordinate and you know how I feel about Amy Butler (love her)!
Get out a sheet of 12 x 12 paper.
Flip your paper over and trace (with your pen or pencil) around the long-side of your magazine file.
This is what it will look like after you have done your tracing.
Use your paper cutter (or scissors) and cut out what you traced. If you don't have a paper cutter, I highly recommend getting one. They are pretty inexpensive (especially if you use your 40% off coupon at Joann's or Michael's) and if you plan on doing much crafting at all, it is well-worth the money.
Here is your long front piece cut out and ready to go.
Take your glue and place it all over the side of the file and place your long piece on top (be sure to line it up perfectly). I just used your basic glue, but the stronger the better. Another idea is to use Mod Podge for this project - if you are into that sort of thing.
Now you could stop here, as you really will only see the front of the file if you keep these in a bookcase, but I decided to take it a few steps further and cover the entire file box. For the sides trace each one on another piece of scrapbook paper.
Use the first one you cut out as a template for your second. You need two in order to cover both sides.
Again, swirl glue all around the side of the file and place your pretty paper on top.
For the other small piece, use a scrap from the first long-piece we cut. Trace the same as the other pieces.
Here is what the smaller side of the file should look like.
To add your labels, I cut small pieces of neutral cardstock (approx. 1" x 3") to back my printed labels.
For the printed part of the label, I used my label maker (oh how I love my label maker!), but if you don't have one, just print your text out on your computer or hand-write it.
Place your labels all at the same height on the long-side of the file.
Here is what your pretty magazine file will look like after it is complete. Looks like it cost a lot more than the 60 cents that I paid for each file, right?
Here are some more files that I did as well in coordinating Amy Butler scrap paper.
These files just make me so happy, now if I could just get the rest of my "studio" to make me this happy!!


0 comments:
Post a Comment